Currently playing:

Saturday, November 12, 2011

DIY Speaker Sheilding

I've always loved vector games of the 80's, and spent many a coin on Asteroids and Battlezone back in the day.  Plus, the vector graphics looked ahead of their time back then, so that only made these games seem much more appealing.

Anyway, over this past summer I had an opportunity to buy a vector cabinet locally, and jumped at the offer, considering the game was in such great condition.


Space Duel is an interesting two player cooperative take on traditional Asteroids.  Plus its a color vector game!  There was only one problem I noticed with the cab, and that was a color blooming issue in the lower left corner of the vector tube.  Actually it was more than just color, the convergence of the tube was pulling in that corner, but he adjusted the picture to be smaller in the center of the screen so the vectors weren't as affected as the colors were.  This defect helped me in negotiating the price on the cab, and in my mind I thought it was really just a degaussing  issue.


After getting the cab home, and using an external degaussing ring,  the color blooming was not going away. I open the cab and inspect around the tube to make sure there was proper shielding, and noticed the original speakers under the control panel, and above the monitor were swapped out for larger size cones, presumably to give it better bass response.  Larger speakers also means larger magnets attached to the back of the speakers, which were upsetting the magnetic balance the cab was originally designed for.


Since these are not high end car audio speakers with protective shielding, I would with have to either replace the speakers with original spec, or try to shield them myself.  I chose the latter since the four larger speakers makes this cab sound tremendous!

A quick googling led me to Andy Rondeau's Do-It-Yourself (DIY) Speaker Project. Although at the top of the article, he states this information is now outdated (as you can now buy expensive speaker shielding kits), I liked his DIY approach with cheap Home Depot supplies.

So I measured my speaker drivers, and went to Home Depot to look for those same steel pipe cap/ covers (which were about $5 a piece).  I also found some electrical boxes (for $1.50 a piece) with much thicker steel and approximately the same size, which fit quite snugly inside the cap covers.


I decided to return the more expensive cap covers, and just stick with the cheap electrical boxes as combined they didn't seem to add any additional shielding from my testing.  The boxes were a bit larger than the two speaker drivers behind the marquee, but fit perfectly over the speakers under the control panel.


(Note how close one speaker under the control panel is to the chips on the PCB!)  

I used electrical tape to ensure the boxes didn't fall off, and to insulate the edge next to the speaker terminals.  The results were amazing!


Saturday, October 01, 2011

How not to cause a fire

A couple weeks ago, I made a second XB360 to Jamma adapter for a friend, same as my previous project here. In testing it out on an Astro City cab, I noticed a faint electronics smell, you know that smell from the back of an old dusty television? [Apologies for those not old enough to have owned a tube television.] Well I thought nothing of it, and continued to show him how he could configure controls on an XB360 game when all of a sudden a ton of smoke starts pouring out of the converter box! I quickly shut off the cab and pull the converter off the jamma loom to notice it was actually the jamma connector that was burning.


In the pic above, I dug out the burned pins, which basically melted inside the plastic housing.

My guess is I did not put the jamma connector on completely straight, and the ground and +5 pins were making contact with the same tooth on the fingerboard, resulting in a short that started burning the trace as well as the two pins inside the Jamma loom. Well needless to say I was quite embarrassed by this rookie mistake, and realized this could have started a fire if not noticed soon enough. Since this converter box is only used in converting the controls, I didn't need +5, -5 and +12 being connected, so I decided to sand off the contacts [via a dremel] on both sides of the fingerboard to prevent the possibility of this ever happening again.


I hope others learn from my stupid mistake, and make your converter boxes a little safer to operate!

Sunday, August 14, 2011

Monkey Harriers

I picked up a Monkey Ball GDRom on the shmups forum recently (thanks fuko!). Normally this requires the expensive "banana panel", but given I have a Planet Harriers cab with analog stick, I figured it should be compatible - not to mention a lot less phallic than a banana stick.


Swapping out the Hikaru for a Naomi GD was no problem at all, everything hooked right up perfectly! Booted up the game, calibrated the analog stick, and gave it a spin, only to find the vertical axis (up/down) on the analog stick was reversed. Not sure why Planet Harriers analog controls would be any different than other Sega games, but hacking some disconnects for the vertical pot and swapping the wires around solved it quickly.
    

Obviously Planet Harriers is a much better game, so I won't be keeping Monkey Ball in there for long, but it does make for a nice change of pace, and I have always wanted to play the original arcade version of Monkey Ball. :) It's also fitting that both games were developed by Sega's AV division.

Friday, July 29, 2011

Cabinet Linking: Gundam DX (Naomi)

As mentioned in a previous blog post, I never had much interest in Gundam anime or games, but some cool mecha shmups are slowly turning me. After seeing Gundam v.s. Gundam Next in a 4 linked cabinet configuration at Game Center Arcade, I became much more interested in how this particular series plays.

As most Naomi collectors probably know, "Mobile Suit Gundam - Federation VS Zeon DX" on GDRom is one of the cheapest titles you can get for the platform, and gets boring pretty quickly, hence the cheap price. But how does this series continue to exist, and garner such excitement in Japan? Well it seem multiplayer is what really makes this game fun, and being such an arcade hardware geek, I decided to see if I could link two of my own cabinets together for some Gundam action!

Now, I already owned a copy of Gundam DX (like pretty much everyone), and I also have a pair of Naomi GDRom setups, so what I needed to buy first was a second copy of the game. No biggie, it was only $20 on eBay.


Next I needed the all important "communications board". This sits in-between the GDRom DIMM board and the motherboard. I seriously don't understand why the Naomi motherboard has fiber optic connections, yet requires this extra communications board to actually work. Anyway, you'll need two of these boards, and two fiber cables to link the motherboards together.

Checking the brilliant Sega-Naomi website, you'll find the bios list mentions you need EPR-21576F or greater to link Naomi cabinets. I happened to have the latest JPN H bios in two mother boards. Note: you do not need the Network version of the DIMM board to make this work!

Next is the dreaded part of hooking a Naomi system up to a standard jamma Astro City. Needless to say its quite painful to get all the parts required to make this happen, but you should have no problem finding everything on eBay.

My New Astro City has the same power supply as a Blast City, and I also have Naomi cables for this bad boy allowing me to run a Naomi motherboard directly without need for a second power supply or audio amplifier. My original Astro City is not as lucky, so I had to run the entire lot with Sega Power supply, Sega Amplifer with sound pot, etc. Of course both require a JVS to Jamma I/O converter.

The resulting mess, is something that would take a lot of work squeezing inside the cabinets, so I just left them outside for now.

At this point, powering up both systems, with the fiber optic cables hooked up, would do nothing more than run both games independently. You need to go into the game configuration, and set the networking assignment to "Master" on one, and "Slave" on the other. "Max Operations" and "Side Select" are used if you still want people to be able to play independently of each other, and choose which side of the battle they wish to be on. I just left these to their defaults since I wanted cooperative play.

Now after restarting both systems, you should get a message saying its checking the network, and after 5-10 seconds of this blinking message, they should show they are linked, and the games should start in parallel.
    

Now all I need is to invite a few friends over and convince them to play this game instead of some shmups. This is probably the most difficult part of the experiment.


Friday, June 17, 2011

Mecha shmups

I've never been a huge fan of Gundam type mecha games (or anime for that matter), but these two high class mecha shmups are quickly winning me over with their incredible soundtracks, and highly detailed hand pixeled renderings.

First up is Rohga Armor Force by Data East (also known as Wolf Fang in Japan). The international version is equivalent to the "special mode" of Wolf Fang (if you hold down buttons 1 and 3 while pressing start on Wolf Fang). Special mode cuts out the story line elements between stages (there is still story chatter at the beginning and ending of each stage), and combines all 4 branching paths to an unabridged 12 mission marathon.


Completing Rogha/Wolf Fang with a single credit is a herculean feat, as the 12 consecutive stages will run you about 60 minutes!

Next up is Cybattler by Jaleco. A vertical mecha shmup, and primary inspiration for Grev's latest (last?) shmup for NESiCAxLive arcade platform and XB360 - Strania.

Jaleco wasn't typically known for releasing very detailed or high quality titles, but they really put everything behind this game. The soundtrack is outstanding, boss designs are innovative, and mecha control scheme quite intuitive with a two button shot/sword and strafe while holding either button down. I'll reserve final judgement until I spend more time with it, but needless to say its quite difficult as I couldn't get past stage 2 boss without a lot of practice.

Sunday, May 15, 2011

The Shmupmeet

The underground arcade fighting scene has made a magnificent comeback in recent years, with local tournaments featured in bars, hotel conference rooms, and a handful of arcades left in existence, ultimately leading to a final showdown in Las Vegas (EVO).


The above picture may look just like one of these fighting events, except its not. These people are not crowding around opponents beating each other to a bloody pulp, or trash talking one another with gripes about button mashing or forbidden combo hacks. These people are playing "shmups". Yes shmups, that ugly word used to describe the genesis of arcade games, the shoot-em-up. One ship against an armada of invading enemy. They shoot, you dodge, you shoot back. Simple in principle, yet amazingly satisfying.


Modern shmups have evolved quite a long ways from the original Space Invaders of the late 70s. In fact they've more accurately mutated into a sub-species of score based challenge that have nearly caused their own extinction, save for a very few die-hard obsessed fans. With only a few companies left today making shmups for arcade and console, its hard to believe anyone much cares about the genre, but these dark grainy cellphone pictures you are seeing here show there is still an active underground following, and not just in the SF Bay Area, but around the world [see videos included at the end of this post].


Will shmups one day be lifted from its cult following to be recognized as a legitimate tournament sport like fighting games have? Unlikely, as score based single player games typically don't fair well in tournament style events. Although I've been successful in the past running shmupmeet challenges, its not anything like the Player vs Player excitement of a spectator's sport. Still, there are a few hybrid style fighting-shmups, and other interesting ways to pit two players against each other in a normally co-operative shmup, which make for some great smack talk and elbow jabbing between opponents.


More shmupmeet videos on youtube here.

Sunday, February 27, 2011

February GETs

I've started picking up a few PCBs again. This time I'm filling in the gaps in my collection with ones I've passed over before, or in the case of Shikigami No Shiro, buy back something I had previously sold. With all of these being cheaper than typical XB360 games, its was hard to pass up.


Shiki and Raystorm are games I consider my least favorite of their respective series, but I'm surprised to be digging Raystorm's atmosphere (mostly because of the Zuntana BGM).

I'm also gaining an affinity for older Visco shmups.

Wednesday, January 26, 2011

Plus Alpha (Jaleco)

While not one of the best shmups that came out in 1989, this rare Jaleco "cute'em-up" sports some nice pixel art, and challenging boss battles (mostly due to the huge hitbox).

The Jaleco Mega System 1-A hardware slows down quite a bit when there are a lot of sprites on the screen, giving a little breathing room for tight dodging, but I don't think that was intentional (ala Cave).


Between stages, there is an interesting slot machine challenge for obtaining shot power-ups, bombs (they call hypers), and 1ups.

Thanks to robivy64 for letting this PCB escape his collection. :)

Saturday, November 27, 2010

Dodonpachi Daifukkatsu X360

I got this yesterday morning, and my eyeballs have been bleeding all different kinds of colors ever since. Cave really pushed this game to the visual limit, and made the Xbox 360 port fun with extra modes. A definite buy of any fan, regardless if you own the PCB or not.


I'm really looking forward to the special package version of DFK BL + Ketsui BL in February.

Friday, November 12, 2010

More D9200 neckboard problems

The Wells-Gardner D9200 continues to be a source of problems for me, despite the neckboards being modified per this service bulletin. Its no wonder these monitor chassis were recalled a long time ago.

You may remember me fixing this issue before when some of the colors would randomly stop and start working. But this time, rather than loosing colors, the Red gun seemed to be stuck on at 100% and wash out the other colors. I confirmed this by going into the digital controls and trying to lower Red to no effect.

Following the neckboard schematics I visually traced the Red signal pathway through the components, and spotted this bulging/blown transistor at Q203.


According to the schematic, Q203, which is a KSP2222A transistor, is what limits the Red signal, so I'm sure its the culprit in this problem. I placed an order with Mouser Electronics for a bunch of these, and a few more NTE2501's just in case. :)

[11/17/10 Update] Well that didn't fix it, so back to troubleshooting. :( [/update]

Sunday, October 24, 2010

Great Mahou Daisakusen item collection

I may not be great at item collections in Dimahoo / Great Mahou Daisakusen, but at least I was able to complete this full art set. :)


(With special thanks to Mikhail, Tom, and Laurent for helping me obtain a few of these pieces.)

Saturday, September 18, 2010

Hacking the MGCD (Part 2)

The Dreamcast version of the MGCD has a similar issue to the PS2 version, of not being exactly JAMMA plug-in play. The last two edge pins on either side of the connector are mapped to joystick buttons rather than grounds (per the JAMMA spec). If these are grounded when you power up the MGCD, it will not accept any inputs from the joystick or other buttons, which is a pretty bad design flaw. So like the PS2 MGCD in Part 1, a simple adapter is needed to isolate these from the edge connector. If you actually need to use buttons 5 & 6 from both players, you can manually connect wires to the adapter and run them up to your control panel.


Above we have the MGCD, with edge adapter, mounted to a Dreamcast, and ready to be connected to any 15khz JAMMA cabinet. I should mention that the same hack used to disable the timer overlay on the PS2 version also works on the Dreamcast version. Also note this MGCD comes with an extra cable to attach a DC memory unit.

If you are like me, you relish the fact that the Dreamcast can output high resolution (31khz/VGA) natively, and I happen to have some JVS/JAMMA cabinets with tri-sync monitors. So you might think that simply using a DC-VGA adapater in place of the MGCD AV cable would work. Unfortunately its not that easy. The MGCD seems to stop working if there is no input video sync present at the MGCD AV connector. So a small hack is required to the DC-VGA box.


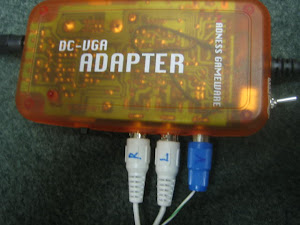
Shown above is my DC VGA box, which has its Composite Video Output connector modified to also be connected to composite sync, which is pin #10 on the Dreamcast AV input cable. You do not need to disconnect composite video pin #13, having both connected to the RCA jack at the same time will work fine. The blue video sync plug, shown above, is then soldered directly to the MGCD AV connector input pins (as shown below), along with Left and Right sound outputs from the VGA box.


So now I have a choice of using the MGCD amplified mono sound out of the PCB, or using the DC-VGA box's stereo headphone output if my cab has its own stereo amplifier. BTW: only the "Madness Gameware" or "DC Blaze VGA" box has headphone output and volume controls.

Lastly, you may have noticed a toggle switch on my Madness Gameware VGA box, this is a non-related hack I wrote about back in 2002 to force it into either 15khz RGB or 31khz VGA output. This is not needed for the MGCD, since you can get great 15khz RGB output by using the original MGCD AV cable.


So, below is the completed MGCD with Dreamcast VGA and stereo output connectors ready to go on a JVS/JAMMA cab.