Currently playing:
Showing posts with label Misc. Show all posts

Wednesday, July 04, 2012

CGA2VGA scaler for arcade PCBs


********
UPDATE (03/01/15) There have been a lot of breakthroughs in hacking these Gbones upscalers via Raspberry Pi and I2C connection.   Details can be found on the shmups forum thread located here.
********

I made a very interesting discovery with the CGA2VGA scaler that came in my Red Storm cabinet.  The scaler looks like the generic/OEM version we've all seen on eBay for ~$35, except even cheaper since they removed all the components except for RGB input and VGA output.  But the big difference is the one that came in my cab can successfully scale PCBs of various refresh rates, like the very difficult Seibu 55hz games!

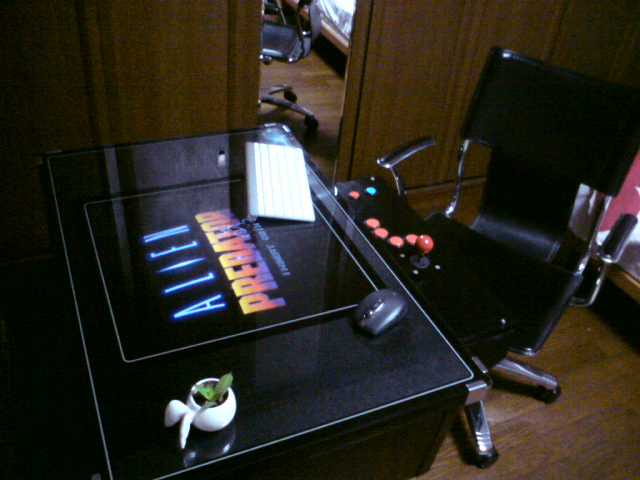
Here is a visual comparison.  The Gonbes GBS-8220 in on the left, and the Red Storm generic is on the right.

(click picture for hires pic)

Comparing both side by side in a similar setup, the menus are exactly the same, except the red storm version allowed for a wider range of values to be set for horizontal and vertical settings.  Looking closely at the both boards, the GBS-8220 has a 2011.08.16 V30 silkscreened on it, while the stickers on the red storm version looks like it's firmware was updated in February of 2012.

So I'm hoping someone can help me figure out how to dump the firmware of the red storm version and see if I can successfully upgrade the GBS-8220 firmware.  I see there are two sets of 4 pin "upgrade" connectors on the right side, although it looks like some were removed.  There is also a 2 pin connector directly under these which I assume may be a selectable "write" jumper?


Sunday, December 04, 2011

Reset highscore table on Cave SH3 PCBs

If you bought Mushihimesama or Espgaluda II Cave SH3 boards used, chances are you have a bunch of very high scores logged in the permanent hishscore section, with no chance of entering your own initials - outside of "Today's Highscores", which erases when you power down the board.  So what's a mediocre shmup player to do?  Well thanks to kernow for starting this thread on the shmups forum, and to rtw and idc for replying with an answer, I bravely tried the procedure on my Mushihimesama PCB.

**** WARNING! ****  I take no responsibility if these instructions lead you to frying your PCB. Proceed at your own risk!

What you need is a 100 ohm resistor (pictured below is actually a 97 ohm precision resistor).


With the PCB turned OFF, first remove the battery, then put one end of the resistor to ground.  You can use any ground.  I found the hole of pin 5 on the missing serial connector a good place so it wouldn't move.  Then carefully hold the other side of the resistor to pin 9 (Data Output) of the RTC/EEPROM (U10), and power on the PCB.  The bootup sequence will first check the program code, and then checksum the EEPROM.  Its at this point, the checksum will fail, and the board will re-initialize the EEPROM, so quickly remove the resistor as soon as you see the EEPROM "initializing".


Since these surface mount chips are very small, and you don't want to accidentally ground other pins on the RTC chip, I used an exacto knife to cut and place small squares of electrical tape to isolate pin 9.


You can verify the procedure worked by going into the operator menu and checking the ranking display.  Here is the before and after shots of Original mode scores on my PCB.


Note: Ibara, Pink Sweets, and Muchi Muchi Pork have an operator menu setting to clear the ranking display (thank you Mr. Yagawa!).  Deathsmiles also has a reset ranking option.  I do not know if Mushihimesama Futari or DoDonPachi DaiFukkatsu boards have this option as I do not own these yet. :)

Saturday, November 12, 2011

DIY Speaker Sheilding

I've always loved vector games of the 80's, and spent many a coin on Asteroids and Battlezone back in the day.  Plus, the vector graphics looked ahead of their time back then, so that only made these games seem much more appealing.

Anyway, over this past summer I had an opportunity to buy a vector cabinet locally, and jumped at the offer, considering the game was in such great condition.


Space Duel is an interesting two player cooperative take on traditional Asteroids.  Plus its a color vector game!  There was only one problem I noticed with the cab, and that was a color blooming issue in the lower left corner of the vector tube.  Actually it was more than just color, the convergence of the tube was pulling in that corner, but he adjusted the picture to be smaller in the center of the screen so the vectors weren't as affected as the colors were.  This defect helped me in negotiating the price on the cab, and in my mind I thought it was really just a degaussing  issue.


After getting the cab home, and using an external degaussing ring,  the color blooming was not going away. I open the cab and inspect around the tube to make sure there was proper shielding, and noticed the original speakers under the control panel, and above the monitor were swapped out for larger size cones, presumably to give it better bass response.  Larger speakers also means larger magnets attached to the back of the speakers, which were upsetting the magnetic balance the cab was originally designed for.


Since these are not high end car audio speakers with protective shielding, I would with have to either replace the speakers with original spec, or try to shield them myself.  I chose the latter since the four larger speakers makes this cab sound tremendous!

A quick googling led me to Andy Rondeau's Do-It-Yourself (DIY) Speaker Project. Although at the top of the article, he states this information is now outdated (as you can now buy expensive speaker shielding kits), I liked his DIY approach with cheap Home Depot supplies.

So I measured my speaker drivers, and went to Home Depot to look for those same steel pipe cap/ covers (which were about $5 a piece).  I also found some electrical boxes (for $1.50 a piece) with much thicker steel and approximately the same size, which fit quite snugly inside the cap covers.


I decided to return the more expensive cap covers, and just stick with the cheap electrical boxes as combined they didn't seem to add any additional shielding from my testing.  The boxes were a bit larger than the two speaker drivers behind the marquee, but fit perfectly over the speakers under the control panel.


(Note how close one speaker under the control panel is to the chips on the PCB!)  

I used electrical tape to ensure the boxes didn't fall off, and to insulate the edge next to the speaker terminals.  The results were amazing!


Saturday, October 01, 2011

How not to cause a fire

A couple weeks ago, I made a second XB360 to Jamma adapter for a friend, same as my previous project here. In testing it out on an Astro City cab, I noticed a faint electronics smell, you know that smell from the back of an old dusty television? [Apologies for those not old enough to have owned a tube television.] Well I thought nothing of it, and continued to show him how he could configure controls on an XB360 game when all of a sudden a ton of smoke starts pouring out of the converter box! I quickly shut off the cab and pull the converter off the jamma loom to notice it was actually the jamma connector that was burning.


In the pic above, I dug out the burned pins, which basically melted inside the plastic housing.

My guess is I did not put the jamma connector on completely straight, and the ground and +5 pins were making contact with the same tooth on the fingerboard, resulting in a short that started burning the trace as well as the two pins inside the Jamma loom. Well needless to say I was quite embarrassed by this rookie mistake, and realized this could have started a fire if not noticed soon enough. Since this converter box is only used in converting the controls, I didn't need +5, -5 and +12 being connected, so I decided to sand off the contacts [via a dremel] on both sides of the fingerboard to prevent the possibility of this ever happening again.


I hope others learn from my stupid mistake, and make your converter boxes a little safer to operate!

Saturday, September 18, 2010

Hacking the MGCD (Part 2)

The Dreamcast version of the MGCD has a similar issue to the PS2 version, of not being exactly JAMMA plug-in play. The last two edge pins on either side of the connector are mapped to joystick buttons rather than grounds (per the JAMMA spec). If these are grounded when you power up the MGCD, it will not accept any inputs from the joystick or other buttons, which is a pretty bad design flaw. So like the PS2 MGCD in Part 1, a simple adapter is needed to isolate these from the edge connector. If you actually need to use buttons 5 & 6 from both players, you can manually connect wires to the adapter and run them up to your control panel.


Above we have the MGCD, with edge adapter, mounted to a Dreamcast, and ready to be connected to any 15khz JAMMA cabinet. I should mention that the same hack used to disable the timer overlay on the PS2 version also works on the Dreamcast version. Also note this MGCD comes with an extra cable to attach a DC memory unit.

If you are like me, you relish the fact that the Dreamcast can output high resolution (31khz/VGA) natively, and I happen to have some JVS/JAMMA cabinets with tri-sync monitors. So you might think that simply using a DC-VGA adapater in place of the MGCD AV cable would work. Unfortunately its not that easy. The MGCD seems to stop working if there is no input video sync present at the MGCD AV connector. So a small hack is required to the DC-VGA box.


Shown above is my DC VGA box, which has its Composite Video Output connector modified to also be connected to composite sync, which is pin #10 on the Dreamcast AV input cable. You do not need to disconnect composite video pin #13, having both connected to the RCA jack at the same time will work fine. The blue video sync plug, shown above, is then soldered directly to the MGCD AV connector input pins (as shown below), along with Left and Right sound outputs from the VGA box.


So now I have a choice of using the MGCD amplified mono sound out of the PCB, or using the DC-VGA box's stereo headphone output if my cab has its own stereo amplifier. BTW: only the "Madness Gameware" or "DC Blaze VGA" box has headphone output and volume controls.

Lastly, you may have noticed a toggle switch on my Madness Gameware VGA box, this is a non-related hack I wrote about back in 2002 to force it into either 15khz RGB or 31khz VGA output. This is not needed for the MGCD, since you can get great 15khz RGB output by using the original MGCD AV cable.


So, below is the completed MGCD with Dreamcast VGA and stereo output connectors ready to go on a JVS/JAMMA cab.


Sunday, May 23, 2010

Hacking the MGCD (Part 1)


The MGCD is a console to JAMMA converter created by Taiwanese company Frolicker, and distributed by many Taiwanese arcade resellers. Several versions of the MGCD were produced for Dreamcast, Playstation2, Gamecube, and Xbox. What makes the MGCD unique to other pay-to-play console timer PCBs, was the MGCD could be programed to recognize the start game screen of a particular title, as well as the end game screen, allowing it to disable all input, sound, and even video, until the game was fully loaded and start game screen ready. So in a sense, the MGCD could disguise the fact that you were playing the console version of an arcade game. Here is the manual for the MGCD-B Version, showing all the nifty features and settings.

For a pretty stupid reason, the MGCD isn't exactly plug and play with most JAMMA setups. The problem is in the fact that the MGCD maps 12 player action buttons to the jamma finger board, utilizing the last 2 pins on each side, which are typically tied to ground on most JAMMA looms. If these connections are tied to ground, the MGCD will not boot up properly, and simply not work. To get around this, you must either modify your JAMMA loom connector of your cabinet, detaching the ground wires to these last pins, and connecting them to player buttons 5 & 6, or just leave them off completely. So instead of modifying my cabinet, I just created a fingerboard which lifts these last two pins on each side, allowing me to play on any JAMMA cab. If I wanted to use these last two buttons for fighting games, I could simply run a wire to the fingerboard up to the control panel.


Leave the last two pins on either side disconnected.


Similar to other pay-for-play "timer" PCBs, the MGCD can also play credits for time, although with an annoying timer countdown that is displayed once per minute at the bottom of the screen. With the limited number of games recognized by the MGCD firmware, the timer feature is primarily used by most people, where you can setup a single credit to play for a maximum of 256 minutes. The problem, of course, is that that annoying time displayed at the bottom of the screen.


Figuring out how to remove the timer overlay took some trial and error. At first I tried re-routing the RGB video signal from the console output, directly to the front of the fingerboard. This did work, but the signal was unamplified, and too dark/weak to be displayed on an arcade monitor. So the only other option was to figure out which chip on the MGCD was doing the video overlay, and disabling it. This took a lot of probing around, but eventually I found the chip, and grounded one of the legs to effectively disable it.


Video timer overlay chip highlighted in red.


Connecting these two pins (highlighted in red) will disable the video timer overlay.


Now here is what the output looks like without the timer.


Finally, here is the MGCD installed on my PS2, and ready to be played on any JAMMA machine.


Next, I'll talk about how to take the MGCD Dreamcast version and hook it up to a cabinet at either 15khz or 31khz. (Go to Part 2 here!)

Tuesday, March 09, 2010

The TRON desk is back!

Last December, I pointed out that Japanese STG blogger Ikeda_San had this cool black Taito cocktail cabinet, that looked similar to Dillenger's desk in the movie TRON. Well now the desk is back in its full glory, and I can't wait to see it coming out this December!

Sunday, March 07, 2010

Espgaluda II Black Label release party

This past weekend, I hosted a get-together for local SF Bay Area friends to celebrate Cave's Espgaluda II Black Label for XB360. I have to admit that one of the best things about these latest Cave ports are the Novice modes. Although these provide little challenge for 1CC, they do give an opportunity to really understand the deep scoring mechanics for what is considered one of Caves most complex games. I can attest to getting quite frustrated at this game in PCB form, and as such, have never given it a lot of attention, but am really enjoying the opportunity to learn it in a more friendly environment, which I'm sure non-shmup players would also find quite accessible. It seems that Cave really does understand the difference between their hardcore PCB fans and consumer console players.


Besides playing Cave's latest XB360 port (with its equally awesome Black Label and Arrange modes), we also played a few unreleased Cave titles, namely Muchi Muchi Pork and Pink Sweets, as well as some Type X2 games, and classic Genesis games via a jamma-converter.

Saturday, February 20, 2010

Astro Restoration

Last month I bought this fixer-upper from Kenchan on the shmups forum. I remember the same cabinet being offered on the sega-naomi forum awhile ago, due to the distict "Lyfer" graffiti scratched into the monitor. :(


Besides the ruined tube, the monitor chassis was non-functioning, the control panel wiring was a mess, and there was a ton of caked on dirt inside the cab.

Since I already had a spare tube, chassis, and panel sitting in my garage, the actual restoration time was just two weekends. I completely gutted it, hosed down the fiberglass frame, then put it back together with the replacement parts. I ran into one small problem with the replacement chassis, which came from an Egret II, but was able to make it compatible with the Astro monitor harness via a slight modification.

I documented the project via twitter using my yfrog picture stream. Here are a few select before and after shots:


And here is the finished cab.


Many thanks to Kenchan for driving this down from Reno!

Saturday, December 26, 2009

A Merry Christmas!

Santa was good to me this Christmas, got some much wanted Technosoft and NMK games, and even a great puzzler for the wife!


Also, my wife got me a 60G harddrive for my XB360, so I can finally log onto the Xbox Live Marketplace to download Mushihemesama Futari Black Label (and more). For those that care, my gamertag is "ArcadeFever".